Flush DNS: What It Is, How to Do It & Why You Should
DNS – What It Is, How to Do It & Why You Should
When you flush the DNS cache on your computer, it clears out the address book that your computer uses to translate website names (like “google.com”) into numeric IP addresses (like “173.194.33.105”). This is useful when you want to clear out any incorrect information that might be cached, or if you’re troubleshooting a problem with your internet connection. In this article, we’ll show you how to flush the DNS cache on Windows 10, 8 and 7.
Flushing your DNS cache is a great way to resolve domain name issues and speed up your web browsing experience. In this article, we’ll show you how to flush DNS on Windows, Mac OS X, and Linux. We’ll also explain why flushing DNS can be a helpful troubleshooting step. Where is the windows search bar?
When you make a change to your DNS settings, it can take up to 48 hours for those changes to propagate. This propagation time is the time it takes for DNS servers around the world to update their records and start using your new DNS settings. In most cases, propagation will happen much sooner than 48 hours.
There are a few manners to flush DNS on different operating systems or “OS”:
Once the browser has that information the browser can store it in its local cache. Next time you will visit the website the local cash will be first presented to show this website quicker. Some IP addresses can also be corrupted which can result into showing to cached data first. The DNS cash can also impact users’ ability to connect to the Internet. Therefore you can speed of the DNS delivery with some specific providers. Cloudflare is the default DNS provider for many websites and is also a popular choice for personal use. Cloudflare’s DNS servers are some of the fastest in the world.
In this post, we’ll cover everything you need to know, including:
what flush DNS does
why you would flush DNS
how to flush DNS
on Windows 10
on Windows 7
on Windows XP and Vista
on Mac OS X
on Chrome
on Linux
What does flush DNS do?
Flushing DNS will clear all IP addresses and DNS records from your cash browser. This can help to resolve any type of security issues, Internet connectivity is among other issues. You have to make sure that the clash is actually clean before you process to other types of operation it’s also important to understand the concept of TTL. TTL means time to live. The TTL specifies a period of time usually in seconds in which the DNS records will remain valid. Within the time period, any queries provided from this website or queries that you will push to your website will be going through this DNS server. Web pages can have different policies for this TTL this does not depend on most operating systems’ configurations.
1. You want to prevent DNS spoofing.
DNS spoofing is a type of attack where an attacker replaces your DNS server’s IP address with their own. This allows them to redirect your traffic to a malicious website. Flushing your DNS cache will remove the spoofed DNS entries and allow you to access the internet normally.
DNS spoofing can be used to steal your personal information, such as login credentials and credit card numbers. It can also be used to distribute malware.
2. You experience 404 errors.
DNS information on your computer may not be generated right away partly if you move to a new domain name system. In that case, it is possible to 404 error or another outdated version of a site when you try to visit. Therefore you should clean your DNS cash at any time to repair at issue.
3. You’re having trouble accessing a website.
If you have issues accessing a website you should first try also to clean your browser’s temporary files.
It may also be interesting to clean your cookies. In our InvestGlass team, we often use a browser we love called Brave. Brave Browser is well known for its privacy and security features. Of course, if you’re using another browser and maybe just stacking information.
m and save everything into cookies.
4. You want to keep your search behavior private.
When you think of tracking user behavior on the internet, you probably think of cookies — but the DNS cache can reveal your search history as well. That’s because the DNS cache is designed to act like a virtual address book, storing the information of the websites you visit regularly. To keep this information away from data collectors or bad actors on the web, it’s a good idea to regularly flush your DNS cache.
Now that we understand what flushing your DNS cache means and why you’d want to, let’s walk through how you can do it below.
How to Flush DNS and which command should be command prompt should be performed?
The process for flushing DNS varies depending on your computer’s operating system. You might not be able to proceed to this operation if you don’t have admin password, or access to the command line, or command prompt application. So now he’s looking to the flush DNS, and as well as other DNS records tricks.
How to Flush DNS Microsoft Windows 10
This is the process for flushing your DNS cache on Windows 10. These steps should also work for Windows 8.1
1. Click the Start button. It’s the Windows logo in the bottom left corner.
2. Select Command Prompt.
3. To open the command prompt console, you could also simply press the Windows and R keys at the same time and enter cmd. This is a common terminal app. Some companies and particularly banks will restrict this access.
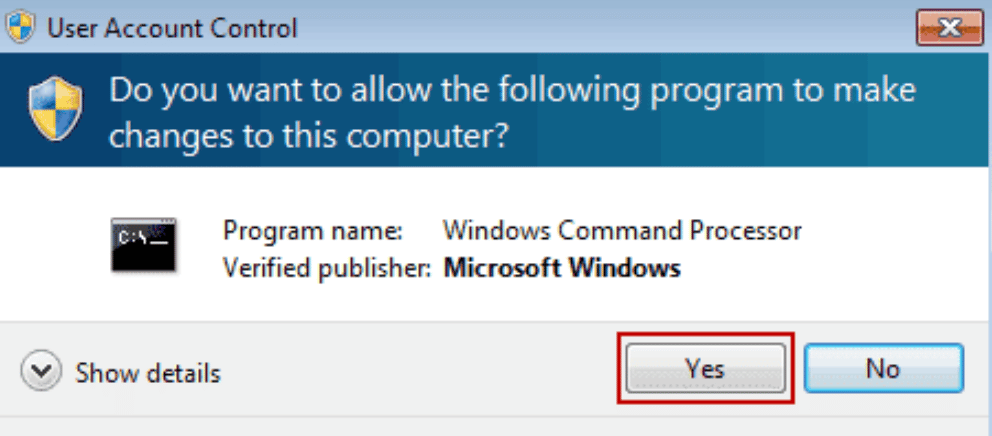
4. You may see a popup asking if you want to allow Command Prompt to make changes to your computer. If you do, select Yes.
5. If you are asked for an administrative login at this point, then you’ll need to contact your system administrator to proceed.
6. In the command prompt window, type ipconfig /flushdns.
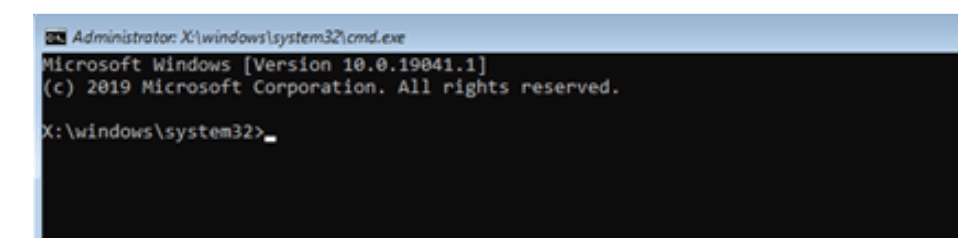
7. Press enter.
8. You should see a message confirming that the DNS Resolver Cache was successfully flushed.
How to Flush DNS Microsoft Windows 7
The process for flushing your DNS cache on Microsoft Window 7 is nearly identical to that of later versions.
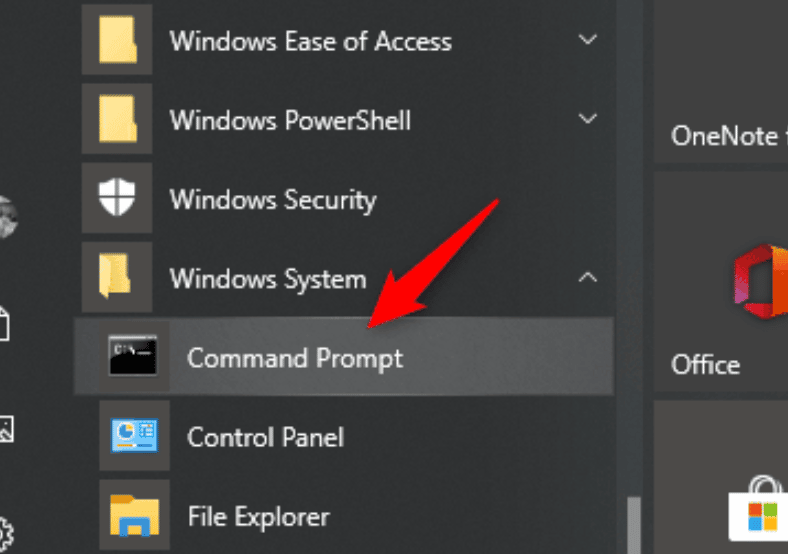
1. Click the Start button. It’s the Windows logo in the bottom left corner.
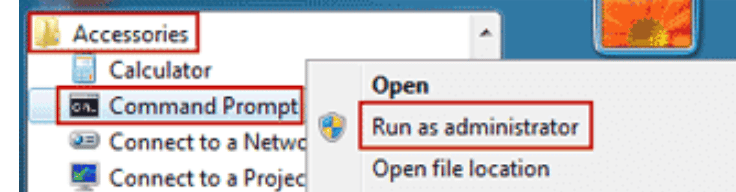
2. Click All Programs > Accessories.
3. Find Command Prompt. Right-click it, and choose Run as administrator.
4. You may see a popup asking if you want to allow Command Prompt to make changes to your computer. If you do, select Yes.
5. If you are asked for an administrative login at this point, then you’ll need to contact your system administrator to proceed.
6. In the command prompt window, type ipconfig /flushdns.
7. Press Enter.
8. You should see a message confirming that the DNS Resolver Cache was successfully flushed.
How to DNS flush Microsoft Windows XP and Vista
The process for flushing your DNS cache on Microsoft Windows XP and Vista is nearly identical to that of Windows 7. However, the message at the end varies and may require admin intervention.
1. Click the Start button. It’s the Windows logo in the bottom left corner.
2. Click All Programs > Accessories.
3. Select Command Prompt.
4. In the command prompt window, type ipconfig /flushdns.
5. Press Enter.
6. You should see a message confirming that the DNS Resolver Cache was successfully flushed. If you receive a message that says “Action Requires Elevation” instead, then you need to contact the admin of your computer to complete the steps above.
How to Flush DNS Mac OS X
The process for flushing your DNS cache on a Mac OS X computer is similar, no matter what software version it’s running. But you will need to know what version for step 6 since the command prompt varies.
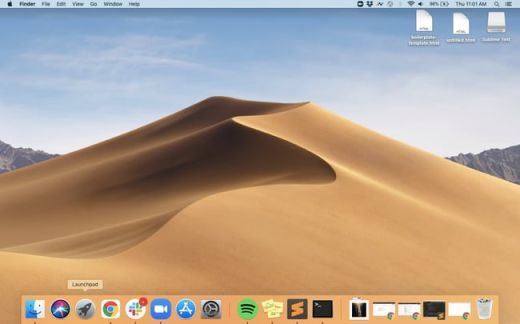
1. Open Finder.
2. Click Applications.
3. Scroll down to the Utilities folder and click it.
4. Open Terminal.
5. To open Terminal, you could also simply open Launchpad and type in “Terminal” in the search bar.

6. In the Terminal window, type in the one of the following commands based on your software version:
- 10.7-10.9, 10.11-10.14 (Lion, Mountain Lion, Mavericks, El Capitan, Sierra, High Sierra, Mojave): sudo killall -HUP mDNSResponder
- 10.10 (Yosemite): sudo discoveryutil mdnsflushcache.
- 10.5-10.6 (Leopard, Snow Leopard): sudo dscacheutil -flushcache
- 10.4 (Tiger): lookupd -flushcache
7. Enter your password and press Enter again.
8. You should see a message confirming that the DNS cache has been reset.
How to Flush DNS Google Chrome browser
Google Chrome browser does keep a DNS cache of its own. If Chrome is set as your default web browser, then you’ll need to clear Chrome’s DNS cache as well as your operating system’s DNS cache. Here’s the process on Google Chrome.
1. Type the following address into your browser’s address bar: chrome://net-internals/#dns
2. Click the Clear host cache.
How to Flush DNS Linux Operating System – Ubuntu or other
Linux systems don’t have a DNS cache by default. However, each distribution might use a different DNSservice to store DNS records locally. Depending on the service, you can either clear the cache or restart the service.
1. Press Ctrl+Alt+T on your keyboard to launch a terminal window.
2. In the Terminal window, type in the one of the following commands based on the service your Linux system is running.
- NCSD: sudo /etc/init.d/nscd restart
- Dnsmasq: sudo /etc/init.d/dnsmasq restart
- BIND: You may have to try multiple commands:
- sudo /etc/init.d/named restart
- sudo rndc restart
- sudo rndc exec
3. You may be asked to enter your password.
4. The service might stop, then start again before sending a confirmation message that the cache was successfully reset.
Flush DNS Cache and IP addresses
There are a lot of reasons to regularly flush your DNS cache.
Yes. there are a lot of reasons why you should clean your DNS cash. The more visited websites, the more data will be stored. It is important also to make sure that you do this for security and phishing schemes. This is not only for technical problems or system security permissions. The best part is how the process is done and for that, we are happy to add Investglass to help you if those comments are not appropriate comment.